Heart Shaped Easel Tutorial
Hi everyone today I,m going to
share with you a Heart shaped easel tutorial.
I,ve been asked quite afew times how I made this card.
It is my own design and can be done using any shape.
First take a heart shape (available on google images)
and place so top part is hanging over the edge of the folded card.
This enables the card to fold and gives a base to attach the full shape to.
Draw around it and cut out through both layers.
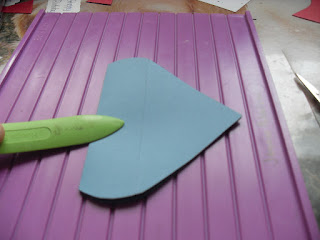
Decide where you want the easel to sit and score approx half way down the shape.
Then draw around and cut out another full heart shape.
Place glue on the flap.
Then take the full heart shape, line up and stick in place.
Next you need to decorate the heart shapes with a decorative paper.
draw around a slightly smaller shape and cut out.
Glue to heart shapes, cutting top of inside paper.
Put this to one side and choose the bottom shape.
Cut out one shape and a smaller layer paper layer and glue together.
Then taking the heart easel line up in the centre of the base shape.
Glue the heart into place.
and from a different angle .
Then choose the shape of the stopper.
draw around the shape in card and a smaller
paper layer to decorate.
Glue together and then glue into place on the base
card making sure that the heart sits back nicely.
Here it shows how it sits nicely.
There you go one heart easel based card
Hope you enjoy having a go yourself.
Just add decoupage , a sentiment and a verse on the underside.
This card took me 30 minutes to make
as well as taking the pictures at the same time.
until tomorrow
jens xx


No comments:
Post a Comment